


After a short pause for the summer, the great de-cluttering and cheap interior redo process continues…..back in the kids room ( it never ends) from this:

To this:
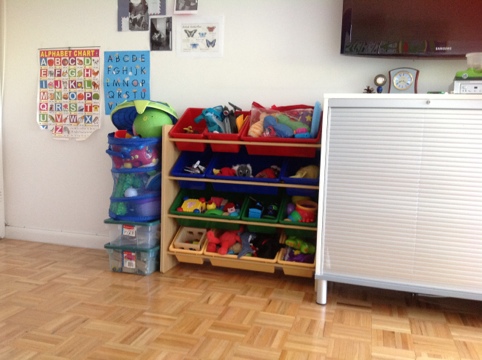
Ah! The relief.
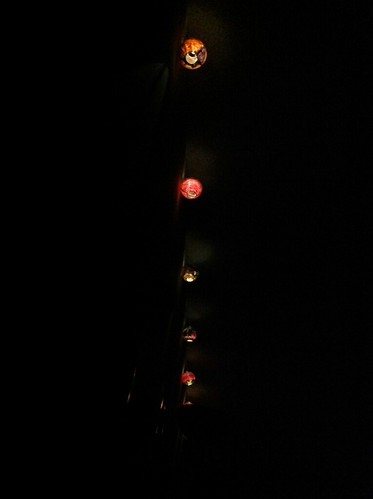
In continuation with Kids Room posts, here is another fun idea that we did for our children’s bedroom. We wanted some fun night lights but did not get anything we liked, so we DIY-ed our own. We used the basic IKEA Solvinden lights (string of 8) with a solar panel, like this:

Then we took some paint and my son went to work on them to take the white out and make them look like this:

And strung it up on the wall (near the ceiling) using a staple gun. It looks pretty decorative in the day:

We ran the wire so that the tiny solar panel rests in the window so that it charges in the daytime:

And at the end of the day, the lights emit a warm and lovely glow in the room. Since the “bulbs” have been painted over, they are not too bright-just enough to act like a night-light in the room. The boys love it!
Feel free to share. Just remember to credit us :)!
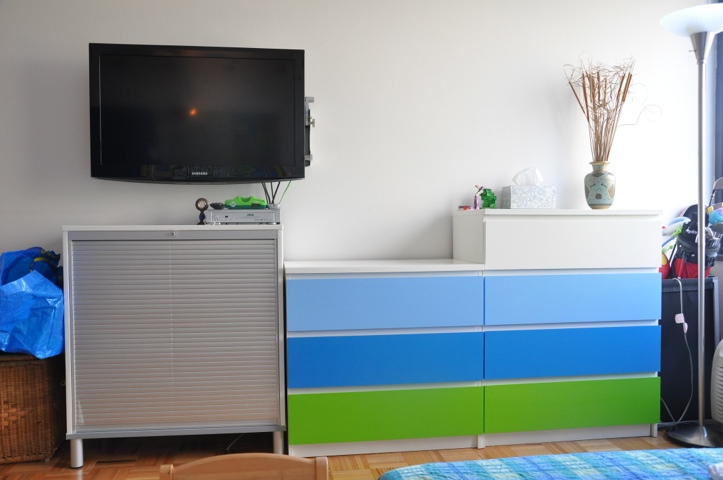
On Before and After you saw the pre and post DIY of some colorful drawers/chest from IKEA. These were relics from previous apartment moves, and some cheap sale items from the “As-is” departments. I was looking for ways to customize my furniture because I hate to waste things so I went online, looking for inspiration. After much searching I found Lindsay. Her DIY prowess and ability to make things her own amazed me and I decided to do something about my chest of drawers/cabinets.
So using her tutorial here, with a few modifications of my own (below) I made my IKEA my own for the kids room.
What you need to know:


What I changed from Lindsay:


Thats it!
Before:

After:
Hope you like…!
This is what has been keeping us busy recently. Full info and a possible tutorial on giving an old room a new life coming soon- once the paint dries!

Silence on the Blog means that the non-blog life has been hectic beyond imagination! As it turns out, it is quite a lot of work to travel overseas if it involved more than one person…especially if that one person is doing most of the organizing!
We look forward to posting more regularly, of travel, of unique and fun design, and just musings over the next few weeks. In the meantime, you all have a great holiday season and you’ll hear from me much more regularly. I promise.

We would like to present the ethereally glassy works of Jamie Harris here within the KidSpace and LightSpace series. Jamie is a glass artist with a difference. He believes deeply in his ability to create from glass, but true to any artist, he is never satisfied and is almost humble about his experience with the material. The spectrum of work of Jamie Harris Studios, shows maturity of content, a deep understanding of material and aesthetics, pleasing contours and striking forms. And one begins to respect his ability all the more when one learns that he learnt glassblowing through the age old method of apprenticeship in addition to be educated in the craft.
By self proclamation, Jamie loves the use to color in his work. His experiments with hues and pantones create a playful quality to even the most mature of his creations.
We were drawn to the Mod Series for children’s spaces. Designed to be sculptures, with scoops that show the depth and layering of color within, the Mod could just as easily be a set of lights in a child’s room.

We also love the 2 color glass sculpture from the Infusion Collection which may be famous someday.


And finally we love the Rock Pendant Chandelier Lights. The form of these lights was imagined with the retro fixture that illuminates it, giving it an almost electric quality. See for yourself.


Good luck to you Jamie. Carry on creating beauty with glass! More of JHS’s pictures here and here.
I have been coming across these 3-D puzzles and toys that are fascinating for kids and adults. Not only do they teach one to see in a non-linear manner, the craftmanship is amazing. I suppose 3-D computer modeling makes this kinda easy, still the idea is what is fascinating One example is the D-Torso range from Aki Corporation, Japan, these “toys”, or one of them, was awarded the Good Design Award in 2001.


Dear Readers,
We hope you enjoyed reading about Canstruction here. We were also live tweeting as the awards were being given out-hope you caught that on Twitter (@ASMDESIGN1) last night.
This past week has been unusually weird and busy in a number of ways. Things are changing elsewhere and at ASM Design- professionally as well as personally. During this time (and it may be for the next 2 months or so) there are happy moments, planned travel overseas (India and around) and some necessary tasks that must be taken care of. In the midst of this, we will try our hardest to maintain regularity of our featured posts, but sometimes we may not be able to make our daily schedule.
Posting is a commitment we take very seriously. We work quite hard to make sure that you get something unique each time you visit. And if we blog about what others are blogging about too, then we try to make it unique in our own way-either by being the only LIVE blogger or by providing our own spin on it.
We hope that you will pardon our occasional absence from now until the end of the year. Keep checking back for fun stuff, more KidSpace, UrbSpace and LightSpace!
Love- ASM DESIGN
